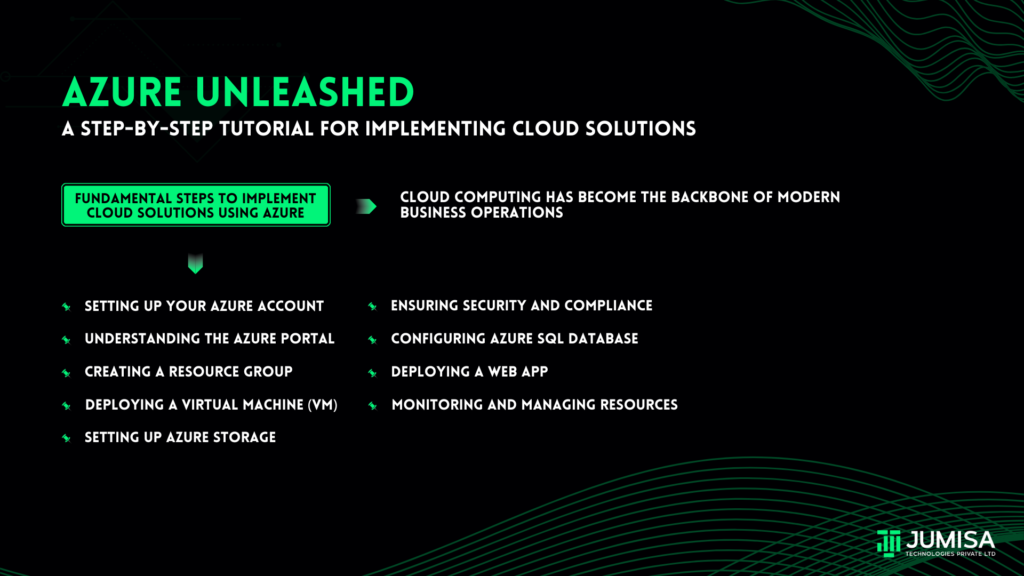
Cloud computing has become the backbone of modern business operations. Among the various cloud service providers, Microsoft Azure stands out due to its robust offerings, flexibility, and seamless integration with existing Microsoft products. This tutorial aims to guide you through the fundamental steps to implement cloud solutions using Azure, unlocking the potential to streamline your business processes and scale your operations efficiently.
Step 1: Setting Up Your Azure Account
The journey begins with creating an Azure account. Microsoft offers a free tier with access to various services for the first 12 months, along with $200 in Azure credits for the first 30 days. Visit the Azure website and click on “Start free.” Follow the on-screen instructions to set up your account. Ensure you have your credit card handy for verification, although you won’t be charged until you exceed the free tier limits.
Step 2: Understanding the Azure Portal
Once your account is set up, you’ll gain access to the Azure portal, your central hub for managing Azure services. The portal’s intuitive interface allows you to monitor, manage, and deploy resources. Spend some time exploring the dashboard, which displays critical information such as resource health, usage statistics, and billing details.
Step 3: Creating a Resource Group
In Azure, a resource group acts as a container for all your resources (such as virtual machines, databases, and web apps). Organizing resources into groups simplifies management and helps keep your environment structured. To create a resource group:
- Navigate to the “Resource groups” section in the portal.
- Click “Add” and fill in the required details like subscription, resource group name, and region.
- Click “Review + create” and then “Create.”
Step 4: Deploying a Virtual Machine (VM)
Virtual machines are essential for running various applications and workloads in the cloud. Here’s how to deploy a VM:
- Go to the “Virtual machines” section.
- Click “Add” and select “Virtual machine.”
- Fill in the basic details, including subscription, resource group, VM name, and region.
- Choose an image (such as Windows Server or Ubuntu) and select a size based on your performance requirements.
- Configure the administrator account by specifying a username and password.
- Set up inbound port rules to allow traffic (e.g., RDP for Windows or SSH for Linux).
- Review the settings and click “Create.”
- The VM will be deployed in a few minutes, and you can connect to it using the provided IP address.
Step 5: Setting Up Azure Storage
Azure Storage offers scalable, secure storage solutions for your data. To create a storage account:
- Navigate to the “Storage accounts” section and click “Add.”
- Select your subscription and resource group.
- Enter a unique name for your storage account and choose the region.
- Select the performance tier (Standard or Premium) and the account kind (e.g., StorageV2 for general-purpose).
- Review the settings and click “Create.”
- Once created, you can manage your blobs, files, queues, and tables within this storage account.
Step 6: Configuring Azure SQL Database
Azure SQL Database is a fully managed relational database service. To set it up:
- Go to the “SQL databases” section and click “Add.”
- Select your subscription and resource group.
- Enter the database name and choose a server (create a new one if needed).
- Select the pricing tier based on your requirements.
- Review and click “Create.”
- After deployment, you can connect to your database using SQL Server Management Studio (SSMS) or other tools, and start creating tables and running queries.
Step 7: Deploying a Web App
Azure App Service enables you to host web applications without managing the underlying infrastructure.
To deploy a web app:
- Navigate to the “App Services” section and click “Add.”
- Select your subscription, and resource group, and enter a name for your app.
- Choose the runtime stack (e.g., .NET, Node.js, Python) and the region.
- Select the pricing plan and click “Review + Create.”
- Once created, you can deploy your code via FTP, Git, or directly from Visual Studio.
Step 8: Monitoring and Managing Resources
Azure provides comprehensive monitoring tools to ensure your resources are performing optimally. The “Monitor” section in the portal allows you to set up alerts, view metrics, and analyze logs. Configure Application Insights for your web apps to gain deeper insights into performance and usage.
Step 9: Ensuring Security and Compliance
Security is paramount in the cloud. Azure offers built-in security features such as Azure Security Center and Azure Policy. Use these tools to assess your security posture, implement best practices, and ensure compliance with regulatory standards. Regularly review access controls and use Azure Active Directory (AAD) to manage user permissions.
Conclusion
Implementing cloud solutions with Azure can significantly enhance your business operations, offering scalability, reliability, and security. By following these steps, you’ll be well on your way to leveraging the full potential of Azure. Remember, continuous learning and adaptation are the key to successful cloud adoption. Azure’s rich documentation and community resources are invaluable assets as you navigate your cloud journey. Happy cloud computing!

