Use case:
- An organisation wants to develop and operate a cloud-based software-as-a-service (SaaS) platform.
- This will be used by thousands of customers worldwide.
- The development process should be streamlined with accelerated delivery of new features and updates.
Solution:
- Implementing a DevOps pipeline.
What is a DevOps Pipeline?
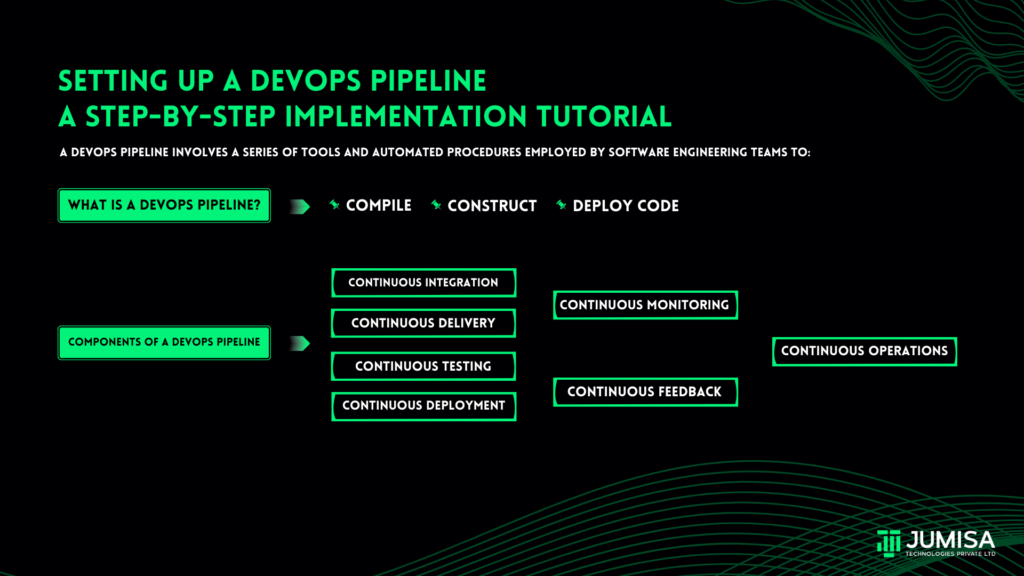
A DevOps pipeline involves a series of tools and automated procedures employed by software engineering teams to:
- Compile
- Construct
- Deploy code
Establishing an efficient DevOps pipeline enables companies to rapidly develop, test, and implement new code continuously.
A key goal of a DevOps pipeline is to automate the software delivery process entirely, removing the need for manual interventions at each stage, which are time-consuming and prone to human error, often leading to delays in deployments.
Shifting from manual adjustments to automated processes not only reduces errors but also allows developers to release higher-quality code more quickly than before.
Components of a DevOps Pipeline
A continuous workflow is synonymous with the DevOps pipeline. Your organisation can utilise different approaches and tools to create a customised DevOps pipeline.
- Continuous integration
- Continuous delivery
- Continuous Testing
- Continuous Deployment
- Continuous Monitoring
- Continuous Feedback
- Continuous Operations
Step-by-step for implementing DevOps pipeline
Largely, there are around 5 steps needed for implementing the DevOps pipeline. Common steps include establishing a CI/CD tool, creating a control environment, forming a build server, setting up build automation tools for testing, and deploying to production.
Step 1: Set up a Continuous Integration and Continuous Deployment (CI/CD) tool
- When your company begins building a DevOps pipeline, your initial priority should be selecting a suitable CI/CD tool.
- Since each company possesses distinct needs and specifications, not every tool will be suitable for all situations.
- Although there exists a plethora of CI/CD tools, Jenkins stands out as one of the most prevalent options.
- Jenkins offers an extensive array of community-contributed plugins and tools, making it highly adaptable to a wide range of applications.
- However, you use any CI/CD tool as per your organisation’s requirement.
Step 2: Acquire a control environment
- In organizations with large development teams, it’s crucial to have a centralized platform where code can be stored, shared, and managed efficiently.
- Source control management tools like Git offer an ideal solution for effective collaboration among team members, regardless of their geographical locations.
- BitBucket and GitLab are two additional examples of popular source control management tools widely used in the industry.
- These platforms provide a comprehensive suite of features beyond basic version control.
- By leveraging these tools, companies can establish a structured and organized development workflow.
Step 3. Establish a build server
- Establishing a build server, also known as a continuous integration (CI) server, is a critical milestone in the pipeline.
- A build server serves as a centralized, stable, and dependable environment for constructing distributed development projects.
- It retrieves integrated code from source code repositories, acts as a hub for all developers, and offers a pristine environment.
- This ensures that the code functions correctly.
- Just like the other tools mentioned, there are various build servers to choose from, each offering different functionalities.
- Jenkins stands out as one of the most widely used solutions for creating builds.
- The alternatives include TeamCity, Travis-CI, and go.cd.
Step 4. Establish testing automation tools for setup or building
- After configuring the code on the build server, the next step is testing.
- During this phase, developers execute automated tests to verify that only error-free code progresses to the deployment stage.
- The testing stage encompasses several automated tests, including unit, functional, integration, and regression tests.
- Typically, these tests are executed through continuous integration (CI) and run sequentially.
- To initiate test execution, TestComplete serves as a reliable option.
- It offers a Jenkins plugin, facilitating test execution within a Jenkins Pipeline project.
- Additionally, it provides features such as storing test history and allowing direct result visualization from Jenkins.
Step 5. Initiate deployment to the production environment
- The last phase of your pipeline involves deploying your software to the production environment.
- The simplest method for deploying the code involves configuring your build server, like Jenkins, to execute a script for deploying your application.
- This setup can be automated or performed manually.
- However, automated deployment should only be employed if you are completely assured that faulty code will not be deployed to production.
- You can connect this process to your test builds so that the script runs only when all tests have been successfully passed.
The End Result of a DevOps Pipeline
- The DevOps pipeline operates as an iterative and predominantly automated process.
- Within this framework, it employs variables to manage its interconnected states throughout the project’s progression.
- Across the various stages of the DevOps pipeline, numerous tasks are executed, each associated with a specific variable.
- These variables serve as repositories for storing and disseminating data across the pipeline, including permissions, user information, and other relevant details.
- By facilitating the sharing of data throughout the pipeline, the DevOps lifecycle becomes resilient, scalable, and adaptable to evolving requirements.
Conclusion
The implementation of the DevOps pipeline requires five steps. This helps with flexibility, scalability, continuous integration and enhanced quality.