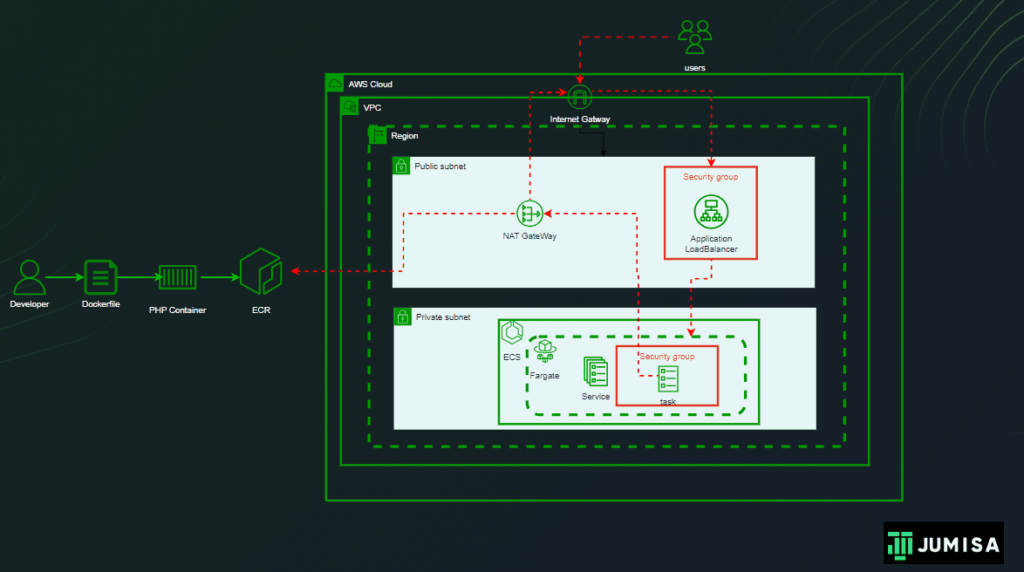
Deploying a PHP application in Amazon ECS (Elastic Container Service) with Fargate involves orchestrating your PHP code within Docker containers and distributing incoming traffic across multiple instances of these containers using a load balancer. Here’s a detailed description of the process.
Table of Contents
Containerization of PHP Application
- Create a Dockerfile that specifies the instructions for building the Docker image, copying your application code into the container, and exposing the appropriate ports for communication.
					FROM php:7.4-apache
EXPOSE 80
COPY . /var/www/html
2. Build the docker file to create a docker image using below command,
docker build -t image_name .
Push Docker Image to Container Registry
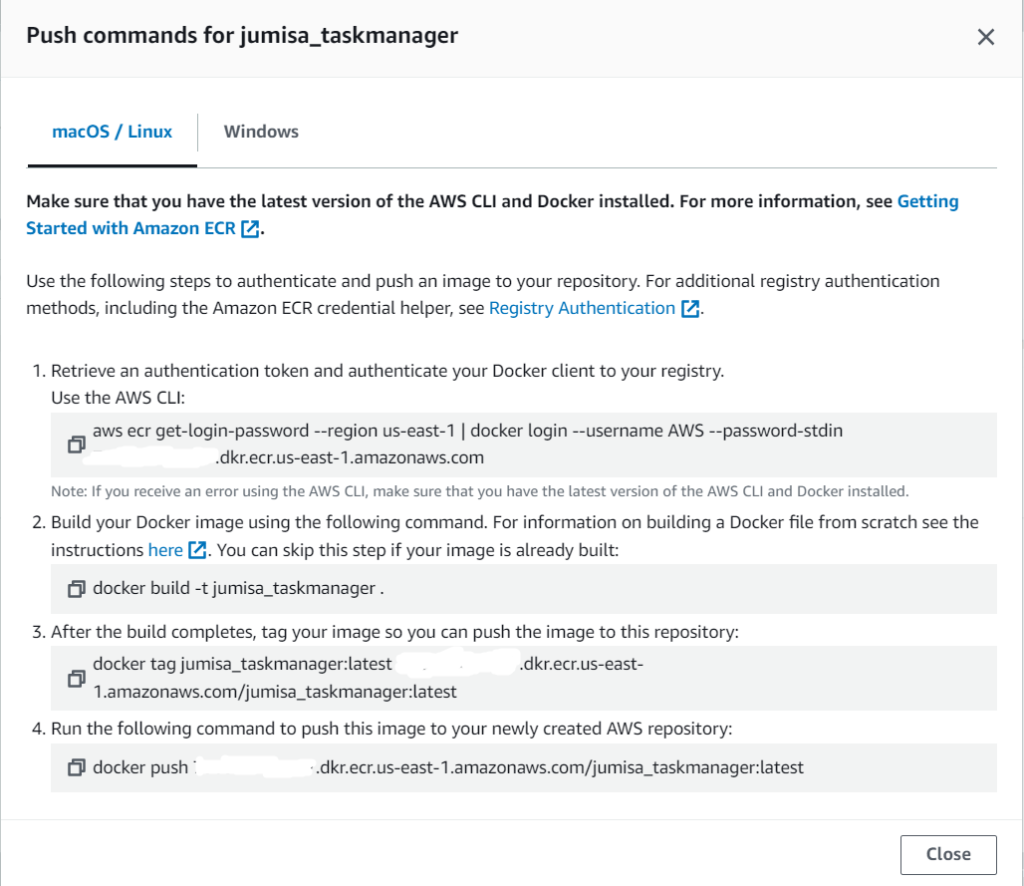
Push the docker image to a container registry like Amazon ECR (Elastic Container Registry) . This makes your Docker image accessible to ECS for deployment. For pushing the image,
- Log in to your AWS Management Console and navigate to the Amazon ECR service.
- Create a new repository by clicking on the “Create repository” button.
- Give your repository a name and optionally configure settings such as encryption and image scanning.
- Once the repository is created, you’ll be provided with instructions on how to push your Docker image to it. These instructions typically involve logging in to the ECR repository using the AWS CLI, building your Docker image, tagging your Docker image with the repository URI, and then pushing the image.
Define a Task Definition
- In ECS, define a Task Definition, which serves as a blueprint for running your PHP application.
- Specify the Docker image you pushed to the registry, along with CPU and memory requirements for each container, port mappings, network configuration, and any other parameters needed to run your application effectively.
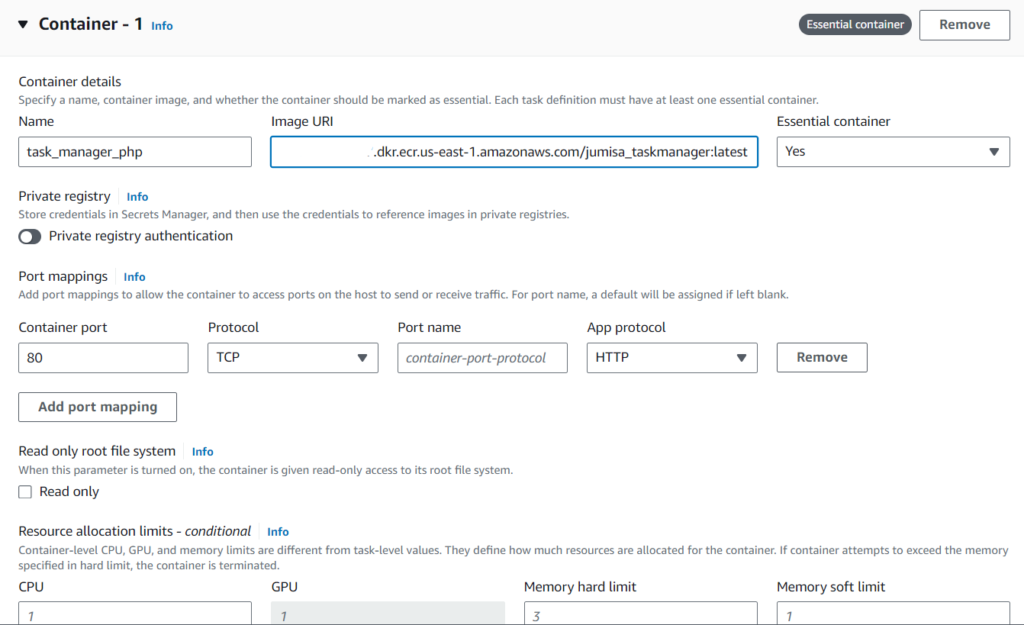
Create an ECS Cluster
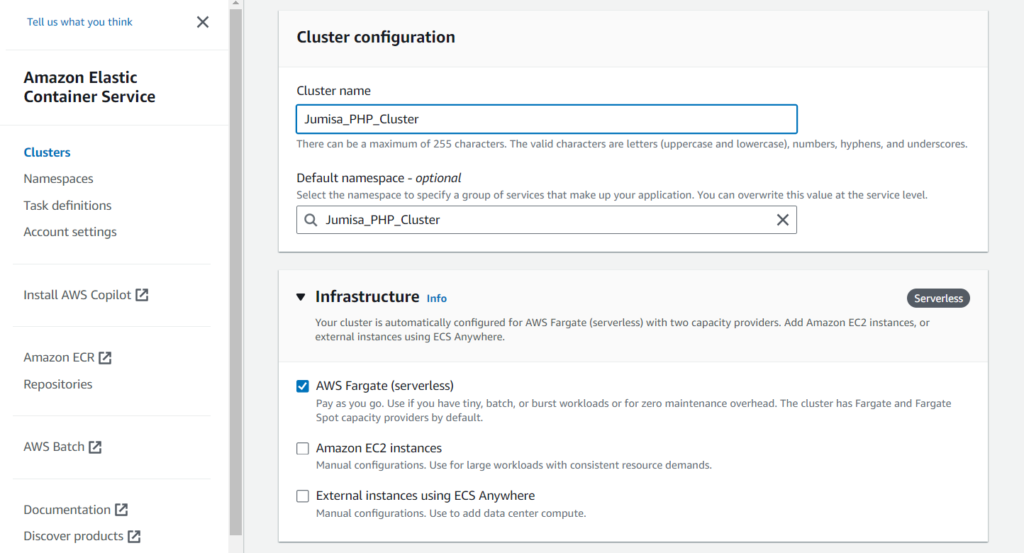
Set up an ECS cluster where your containers will be deployed. You can create a cluster through the AWS Management Console or via the AWS CLI.
- Log in to your AWS Management Console and navigate to the Amazon ECS service.
- In the ECS dashboard, locate and click on the “Clusters” option in the sidebar menu.
- On the Clusters page, click on the “Create Cluster” button.
- Enter a name for your cluster in the “Cluster name” field.
- Choose any one of the following – AWS Fargate, Amazon ECS instances, External instances using ECS Anywhere.
- Review the configuration settings to ensure they match your requirements.
- Click on the “Create” button to create the ECS cluster.
Configure an Application Load Balancer (ALB)
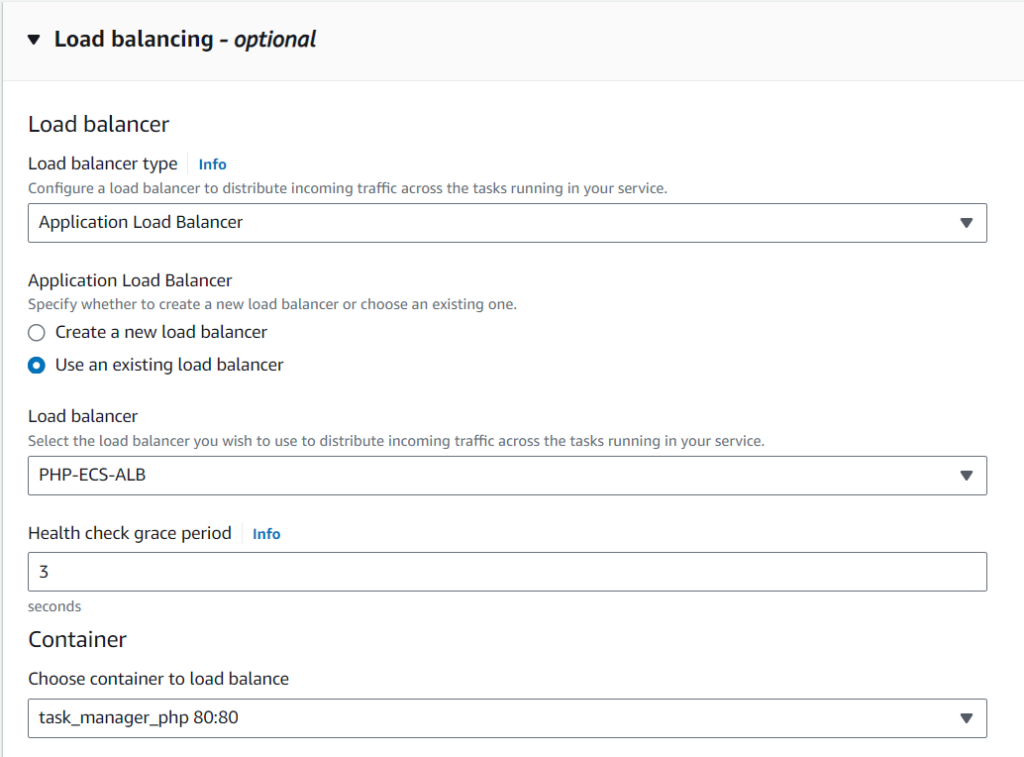
Create an Application Load Balancer (ALB) in AWS. The ALB will act as the entry point for incoming traffic to your PHP application.
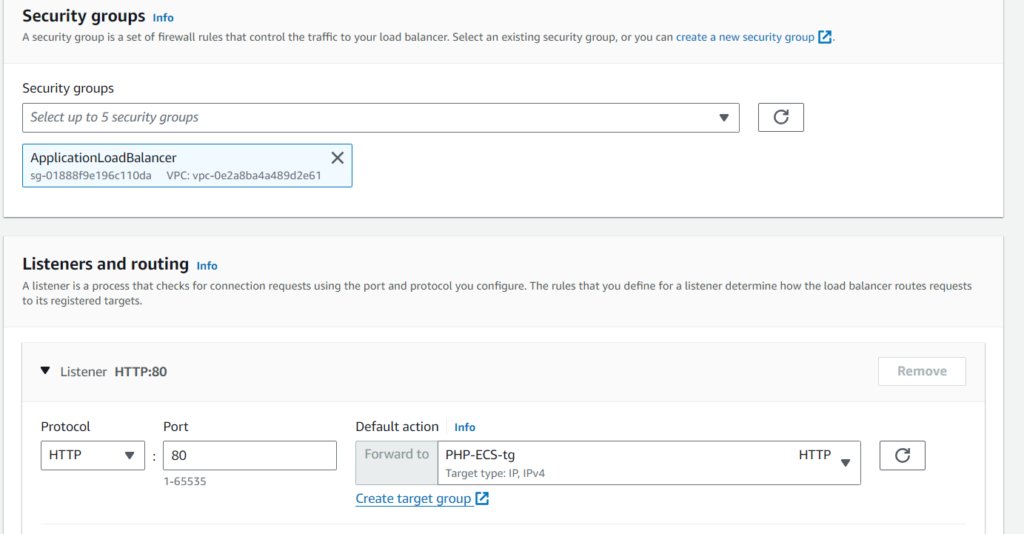
Configure listeners, target groups, and routing rules on the ALB to direct traffic to the ECS tasks (containers) running your PHP application.
- Click on the “Create Load Balancer” and Choose “Application Load Balancer” as the load balancer type.
- Configure the basic settings for your ALB, like Name, IP address type, …
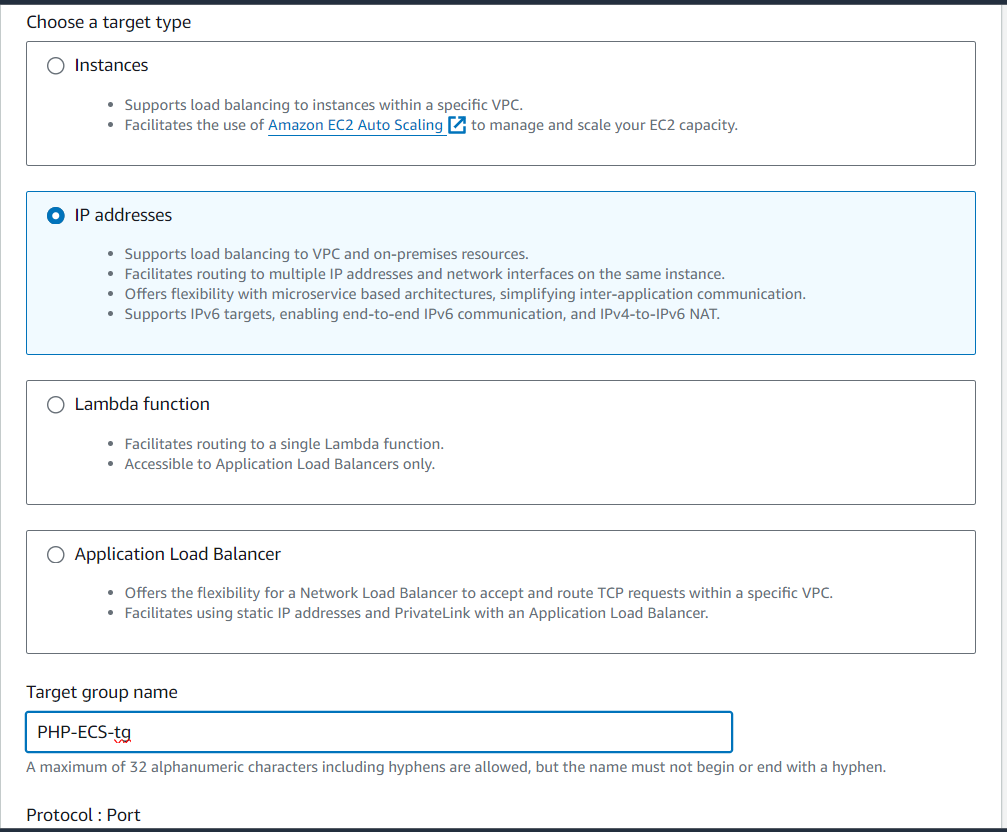
- Create a new target group by clicking on the “Create target group” button.
- Give your target group a name and specify the target type as “IP” as we use Fargate.
- Specify the protocol and port that your ECS tasks are listening on.
- Optionally, configure health checks to ensure that only healthy ECS tasks receive traffic.
- After creating the target group, register your ECS tasks as targets.
- Review the configuration settings and Click on the “Create” button to create the ALB.
- After creating the ALB, you’ll be provided with a DNS name.
Create a Service in ECS
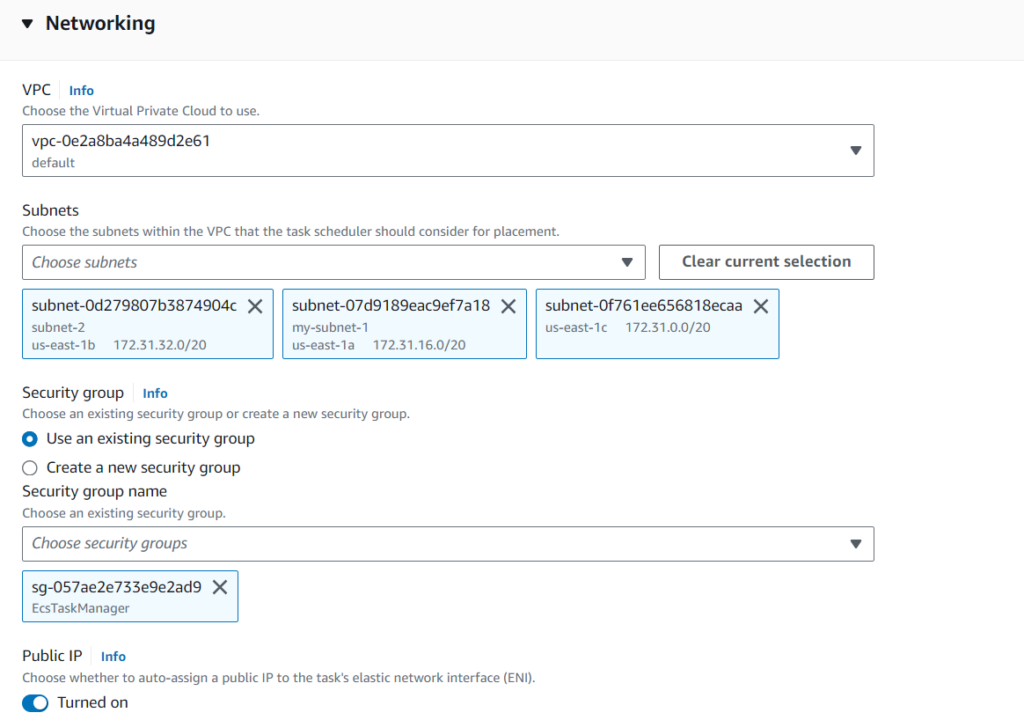
Create an ECS Service for your PHP application. A service allows you to run and maintain a specified number of instances of your Task Definition simultaneously.
Specify the Task Definition you created earlier, along with configurations such as networking,load balancing settings, and optional auto-scaling policies.
Register ECS Tasks with the ALB
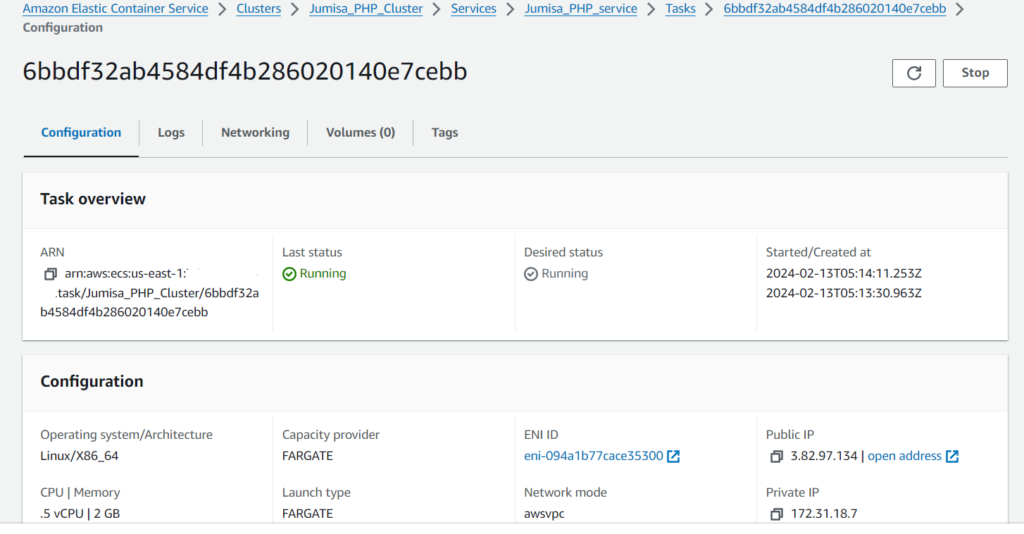
Register the ECS tasks (containers) running your PHP application with the target group associated with your ALB. This ensures that incoming traffic is properly distributed among the containers.
Copy the private ip as in below reference image and configure the target group listener created in ALB.
Test and Monitor
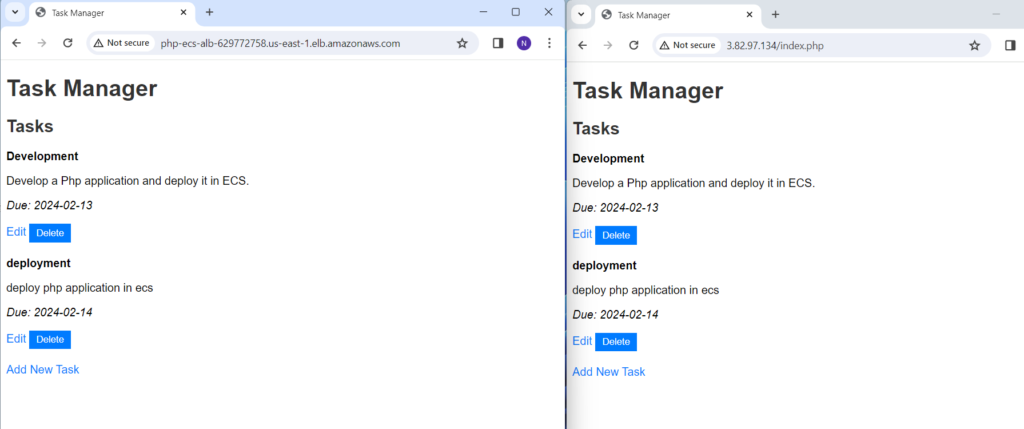
Once deployed, test your PHP application to ensure it is running correctly.
Here, we could see that through ip address we are able to access the php application created. So to avoid that and only through ALB we should access our application, follow next step.
Configure the security group of ALB and ECS task
ALB:
- Click on the security group name of ALB.
- Add inbound rules to allow incoming traffic on the required ports (e.g., HTTP on port 80, HTTPS on port 443).
- Configure outbound rules to allow outgoing traffic to ecs security group.
ECS:
- Click on the security group name of ECS task.
- Add inbound rules to allow incoming traffic on the required ports from application load balancer.
- Configure outbound rules to allow all traffic.
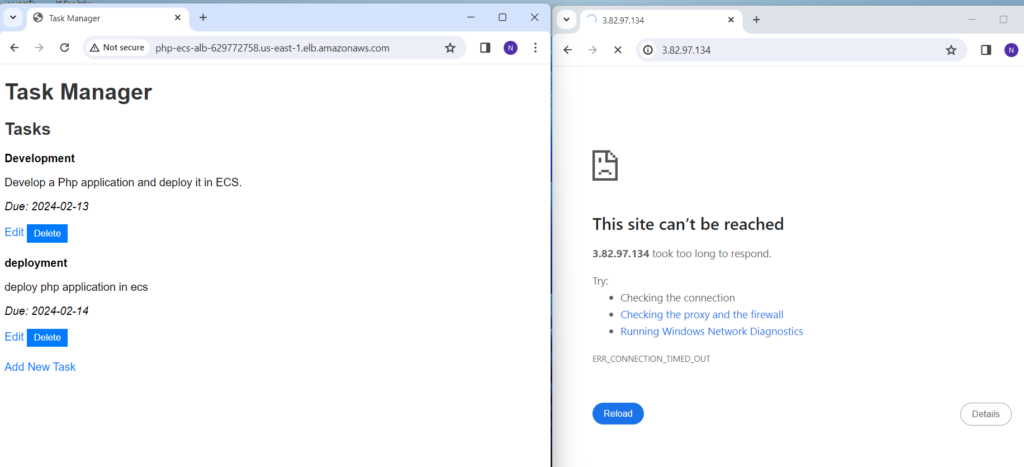
If we update the service for desired task count to 2 or 3, the ip address of task will automatically get registered in target group of the ALB provided if the health check status is success.


